Introduction
Artificial grass is a popular choice for homeowners seeking a low-maintenance, durable alternative to traditional grass. While it can seem daunting to install, DIY artificial grass installation is becoming increasingly accessible, offering significant cost savings. This guide will walk you through the process, from measuring your garden to laying the final turf.
Step 1: Planning Your Project
Measure Your Garden
Before you begin, accurately measure your garden’s dimensions. This is crucial for ordering the correct amount of artificial grass. Remember to account for any obstacles, walkways, or features that might affect the layout.
Tip: Use a tape measure and consider mapping out your garden on a grid system for precise measurements.
Choose Your Artificial Grass
Artificial grass comes in various widths, ranging from 1 to 5 meters. Consider your garden’s size and aesthetic preferences when selecting the width.
Tip: Explore different grass types and textures to find the perfect match for your needs and style.
Step 2: Preparing Your Garden
Remove Existing Turf
Carefully remove the existing turf, aiming for a depth of 40-50mm. This can be done manually with a shovel or with a turf cutter for larger areas.
Tip: Consider renting a turf cutter if you have a large garden.
Lay Type 1 Aggregate Base
Install a Type 1 crushed limestone base layer, ensuring it’s compacted using a wacker plate or similar tool. This layer provides drainage and a firm foundation for your artificial grass.
Lay Sand Base
Spread a layer of sand (10-15mm) over the base, compacting it thoroughly to create a smooth surface. Ensure the sand level aligns with the timber edging.
Tip: Consider renting a vibrating plate or a heavy-duty roller for optimal sand compaction.
Step 3: Installing the Weed Membrane
Lay a weed membrane over the sand layer, overlapping joints by at least 100mm. Secure it firmly to the timber edging.
Step 4: Laying the Artificial Grass
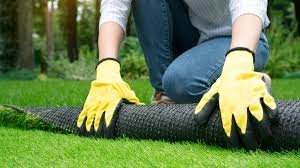
Cut the artificial grass to size, ensuring a sharp knife for clean cuts. Lay the grass in the desired direction, creating a visually appealing pattern.
Tip: Allow the grass to settle overnight to help any wrinkles or kinks relax and fall into place.
Step 5: Joining the Grass
Use specialized glue and seaming tape to join the grass seams. Follow the manufacturer’s instructions for optimal results.
Tip: Ruffle the grass gently to create a natural, seamless look.
Step 6: Securing the Edges
Secure the artificial grass to the perimeter edging using either a staple gun or tiny screws.
Conclusion
Installing artificial grass yourself can be a rewarding and cost-effective project. By following these steps and utilizing the right tools and materials, you can create a beautiful, low-maintenance lawn that will enhance your outdoor space for years to come.
PREGUNTAS FRECUENTES
Q: What tools do I need for artificial grass installation?
A: You’ll need a tape measure, sharp knife, shovel, wacker plate, vibrating plate (optional), heavy-duty roller (optional), glue, seaming tape, and a sharp Stanley knife or cutting blade.
Q: How much artificial grass do I need?
A: Measure your garden’s dimensions in square meters. Remember to add extra length for trimming and fitting.
Q: Can I install artificial grass myself?
A: Yes, many homeowners successfully install artificial grass themselves.
Q: How often should I maintain my artificial grass?
A: Regularly brushing with a stiff yard broom and removing debris will keep your artificial grass looking its best.

